 | Run Saved Searches |
Print the Help...
Run Saved Searches Page
Displaying the Contents of a Saved
Search
Run Saved Searches Page
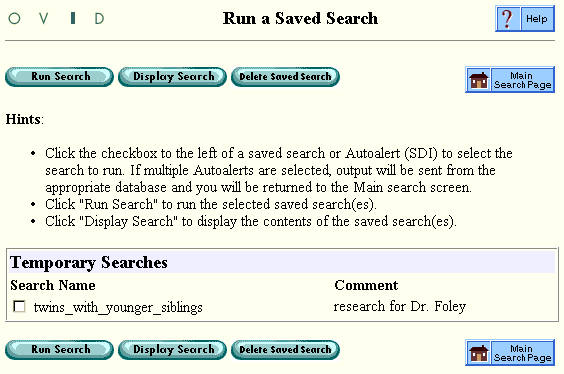
When you click the Run Saved Searches button on the Main Search Page, Ovid displays the list of all Saved Searches, Expert Searches, and AutoAlerts (SDIs) available under your user ID. You must have saved at least one Saved Search in order to access this page. The display will include the comments you typed about the contents and purpose of the searches.
A page similar to the following appears:

- In the Select column, click the button that corresponds to the name of your desired search history.
- Depending on how your system administrator has configured your site, you may see a choice in the Limits column between Latest Update and Select Update(s). If you choose Select Update(s), a screen appears that allows you to choose specific database update or updates for inclusion when running the saved search. If you choose Latest Update, the saved search runs against the latest update. Many sites offer only Latest Update as an option.
- Click the Run Search button to perform the selected search and return automatically to the Main Search Page.
- Click the Main Search Page button to cancel.
- Click the Delete Saved Search button to permanently erase the search history you have selected.
Displaying the Contents of a Saved Search
- From the Main Search Page, click the Run Saved Search icon located below the Search History box.
- On the Run Saved Searches page, click the button in the Select column that corresponds to the name of your desired Saved Search, Expert Search, or AutoAlert(SDI).
- Click the Display Search button to view the contents of the Saved Search on a new page.
- Click the Run Search button to perform the displayed search and return automatically to the Main Search Page. Click the Saved Search page button to view or run other Saved Searches. Click the Main Search Page button to cancel.
Deleting Saved Searches
- From the Main Search Page, click the Run Saved Search icon located below the Search History box.
- On the Run Saved Searches page, select the checkbox that corresponds to the name of the search you would like to delete.
- Click the Delete Saved Search button to permanently erase the selected search history.
- You will then be prompted to decide if this was what you intended to do. Make any corrections and continue by clicking the Delete Saved Searches button. To cancel and return to the Main Search Page, click the Main Search Page icon in the top right hand corner of your screen.
