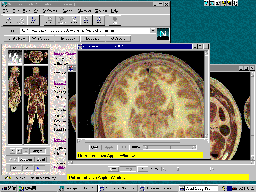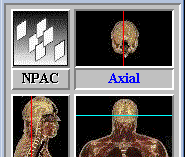

The main panel (shown above at half size) contains image controls and a control panel. The control panel contains resolution controls and access controls.

The image controls display preview slices and let you choose a new slice. You can select the type of slice you want by clicking on the image or the viewpoint name (Axial, Sagittal, or Coronal). This will highlight the name in blue, and the cutting line which produced that image will be indicated by changing color from red to cyan. For example, clicking on the Axial image highlights the cutting line in the Coronal viewpoint, since this is the line you need to move to select a new Axial slice. To chose a new slice, click on the cutting line and drag it to a new position. A new preview image will appear after you release the mouse button.

The resolution controls let you switch between
Low, Medium and High
resolution images for loading.
The current resolution is shown in blue.
Low resolution images are up to 25 KBytes (50 Kbytes for Coronal).
Medium resolution images are up to 75 KBytes (150 Kbytes for Coronal).
High resolution images are up to 180 Kbytes (350 Kbytes for Coronal).
Choose the image resolution appropriate for your computer and network
connection.
High resolution requires a very good Internet connection and a fairly
high-end computer that can handle large images.
Medium resolution requires a good Internet connection (or a lot of patience),
and Low resolution should work for users with modem Internet access
or limited computer resources.

The adjust buttons (the triangle buttons) let you fine tune the exact slice number you want, which is shown in blue for the currently active viewpoint. If you want to see a full size picture of the slice you have chosen, press the Load button to popup up an image slice window, which will display the last image slice you selected at the chosen resolution.

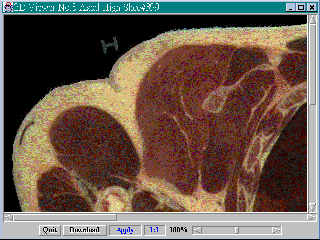
The image popup window (shown above at half size) displays the image slice. If the image is larger than the window area, you can resize the window, and also click or drag on the scroll bars to move around the image. If you click on the image, you can also drag the image by sliding your mouse.

Press the Quit button when you finish viewing the picture. The Download button will transfer the current image to the Web browser (or the image viewer used by the browser) for display, and thus will let you save the image into local file. If you want to resize the image you can click or drag on the scroll bar on the right. The image is initially displayed at 50% or 100% scale. 100% indicates the full resolution image (i.e. 1:1 scale), and you can resize the image from 25% to 200%. You can also obtain a full resolution image by just pressing the 1:1 button. After you press the Apply button, the window will begin to update the image to the scale you assign (this may take some time). Note: If your local machine's resources are limited, please don't try to enlarge the image greater than 100% or your browser may stop working.